Reviews help shoppers trust a store they’ve never bought from before, and a page with real customer feedback on it feels safer to buy from.
You can add reviews to your Squarespace store manually using a testimonials section or connect a review app to collect and display customer feedback. Manual testimonials suit a small collection; an app reduces the work of adding new reviews to your pages.
One rule first : only use reviews you have permission to share, and never write reviews yourself. It breaks shopper trust and can break the rules of platforms and Google.
Difference between these two methods
| Features | Manual Methods | Using a Reviews App |
|---|---|---|
| Setup | Quick for a handful of reviews | Five steps, done once |
| Automatic review requests | × No | ✓ Yes |
| Reviews on each product page | Only if you add them page by page | ✓ Yes |
| Photos and videos from buyers | Only if you upload them yourself | ✓ Yes |
| Importing existing reviews | You retype or paste them | Import from files and sources like Google, Facebook and Etsy |
| Stars in Google | Only if you write and maintain the markup correctly | ✓ Supported through review markup |
| Keeping reviews up to date | By hand, every time | ✓ Automatic |
Method 1: Add testimonials manually to Squarespace
This method use Squarespace's own page editor. They are quick to start, and they need your attention every time a review comes in.
Open your website in Squarespace and click Edit .
Go to the page where you want your reviews to appear, such as your homepage or a product page.
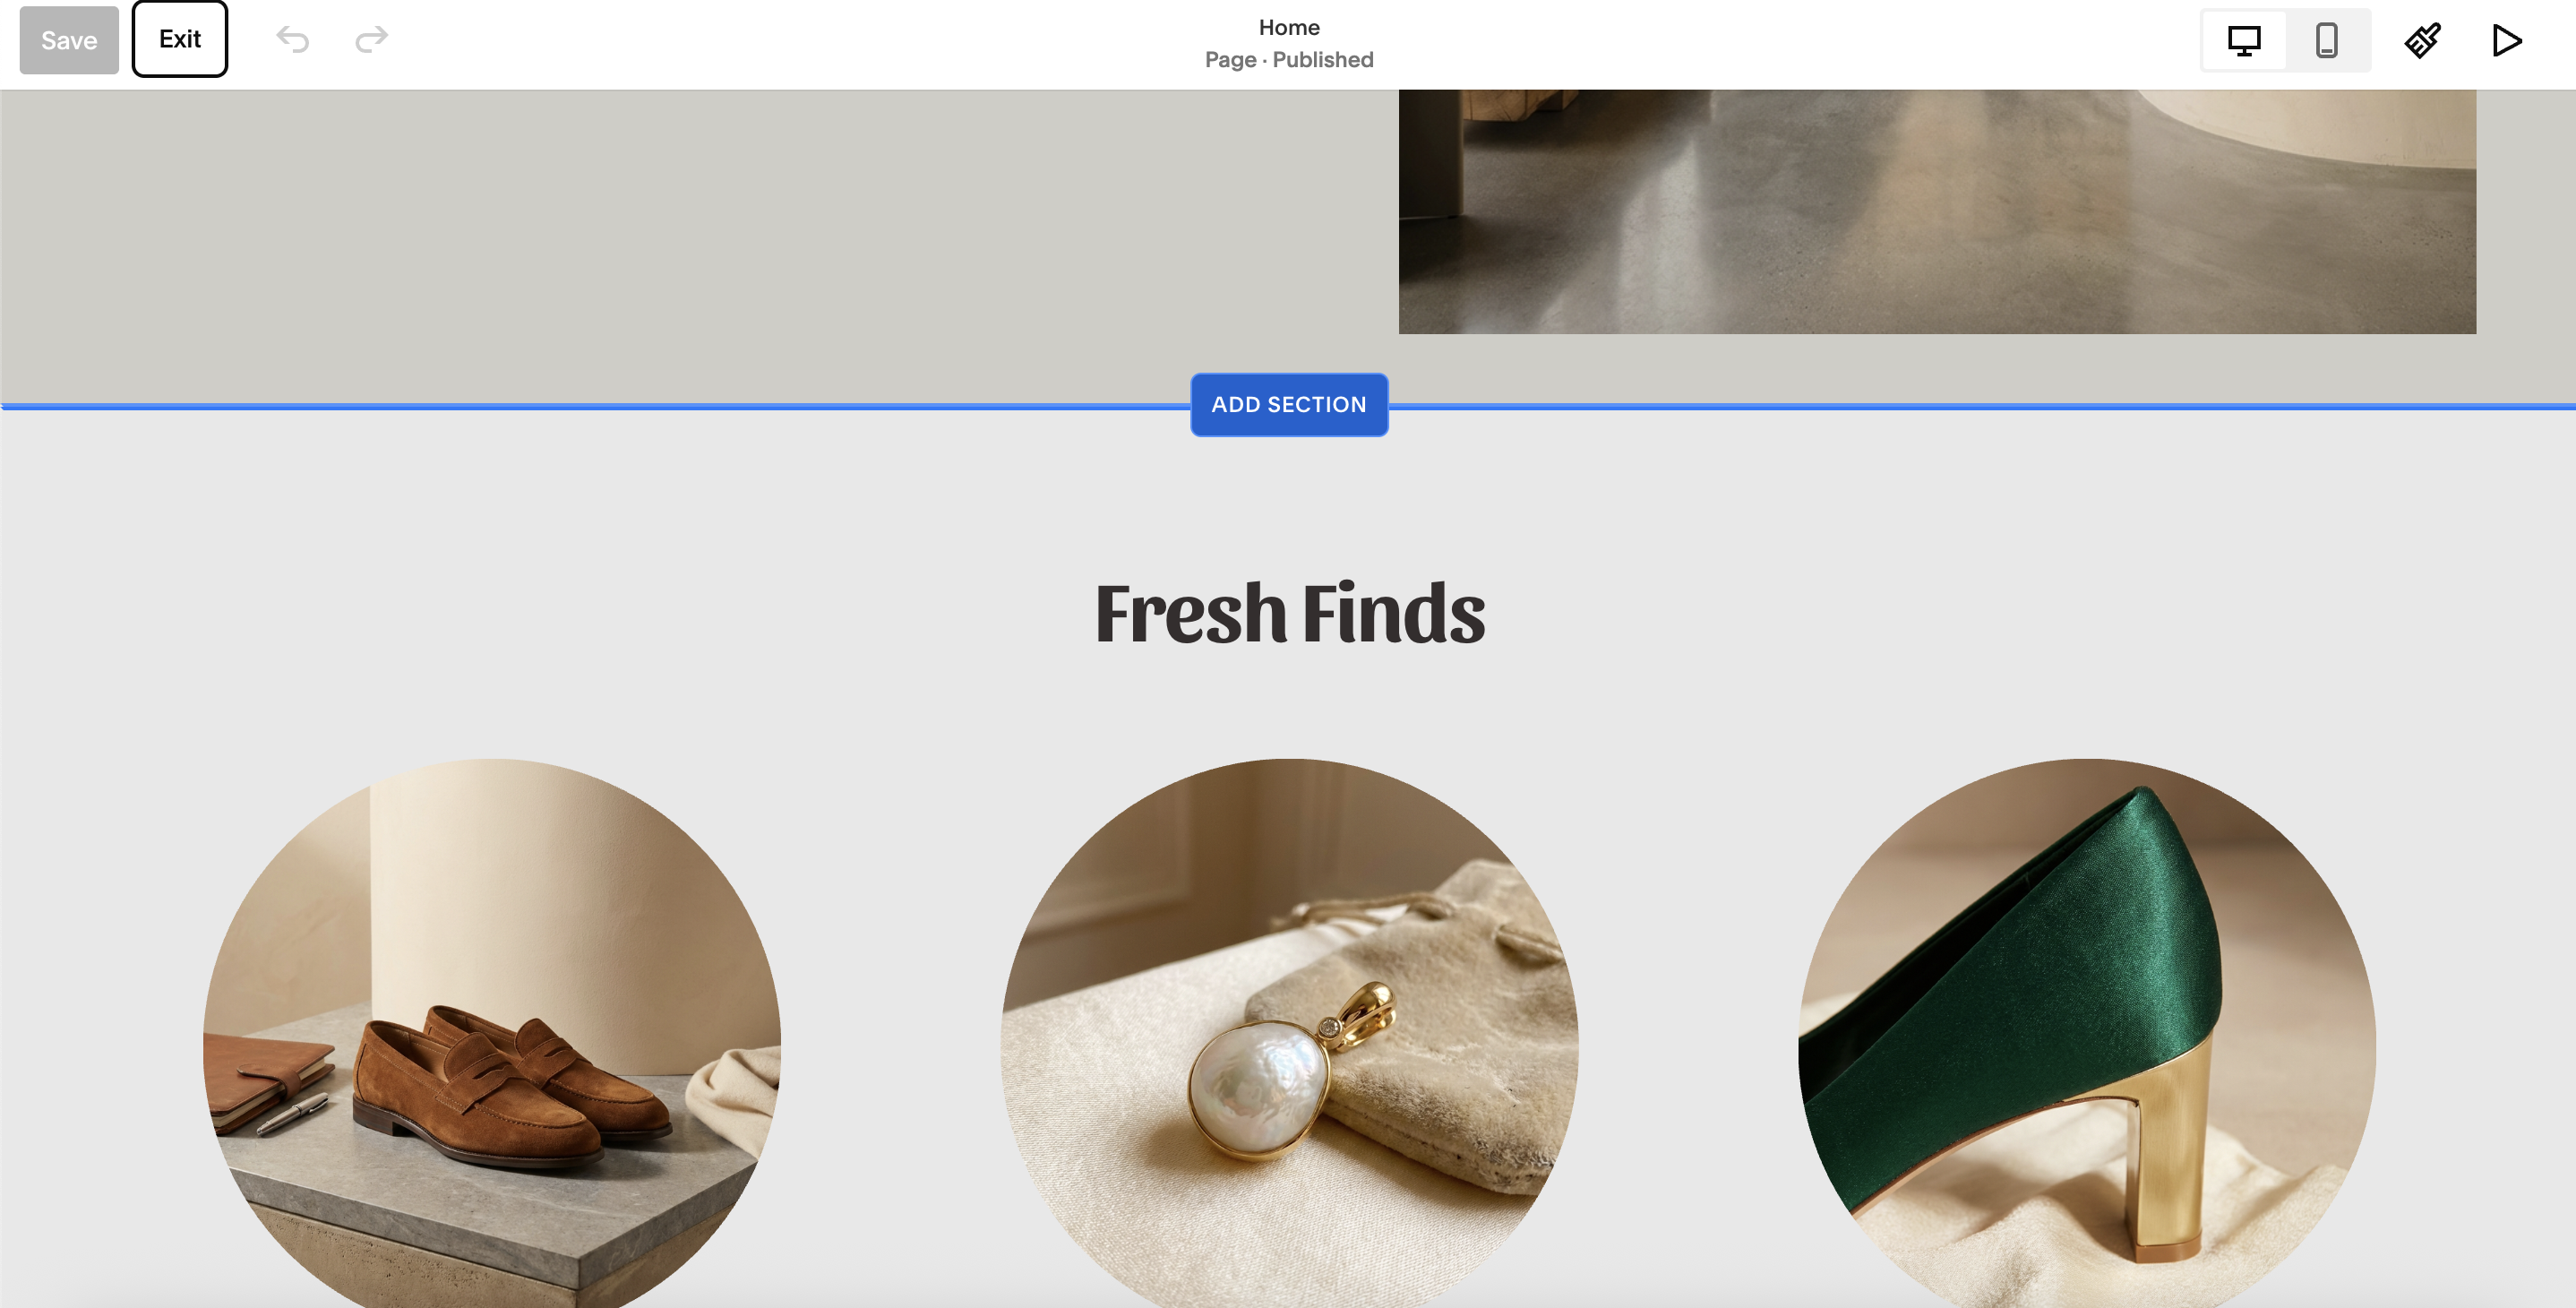
Choose the spot on the page where the reviews should sit and click Add section.
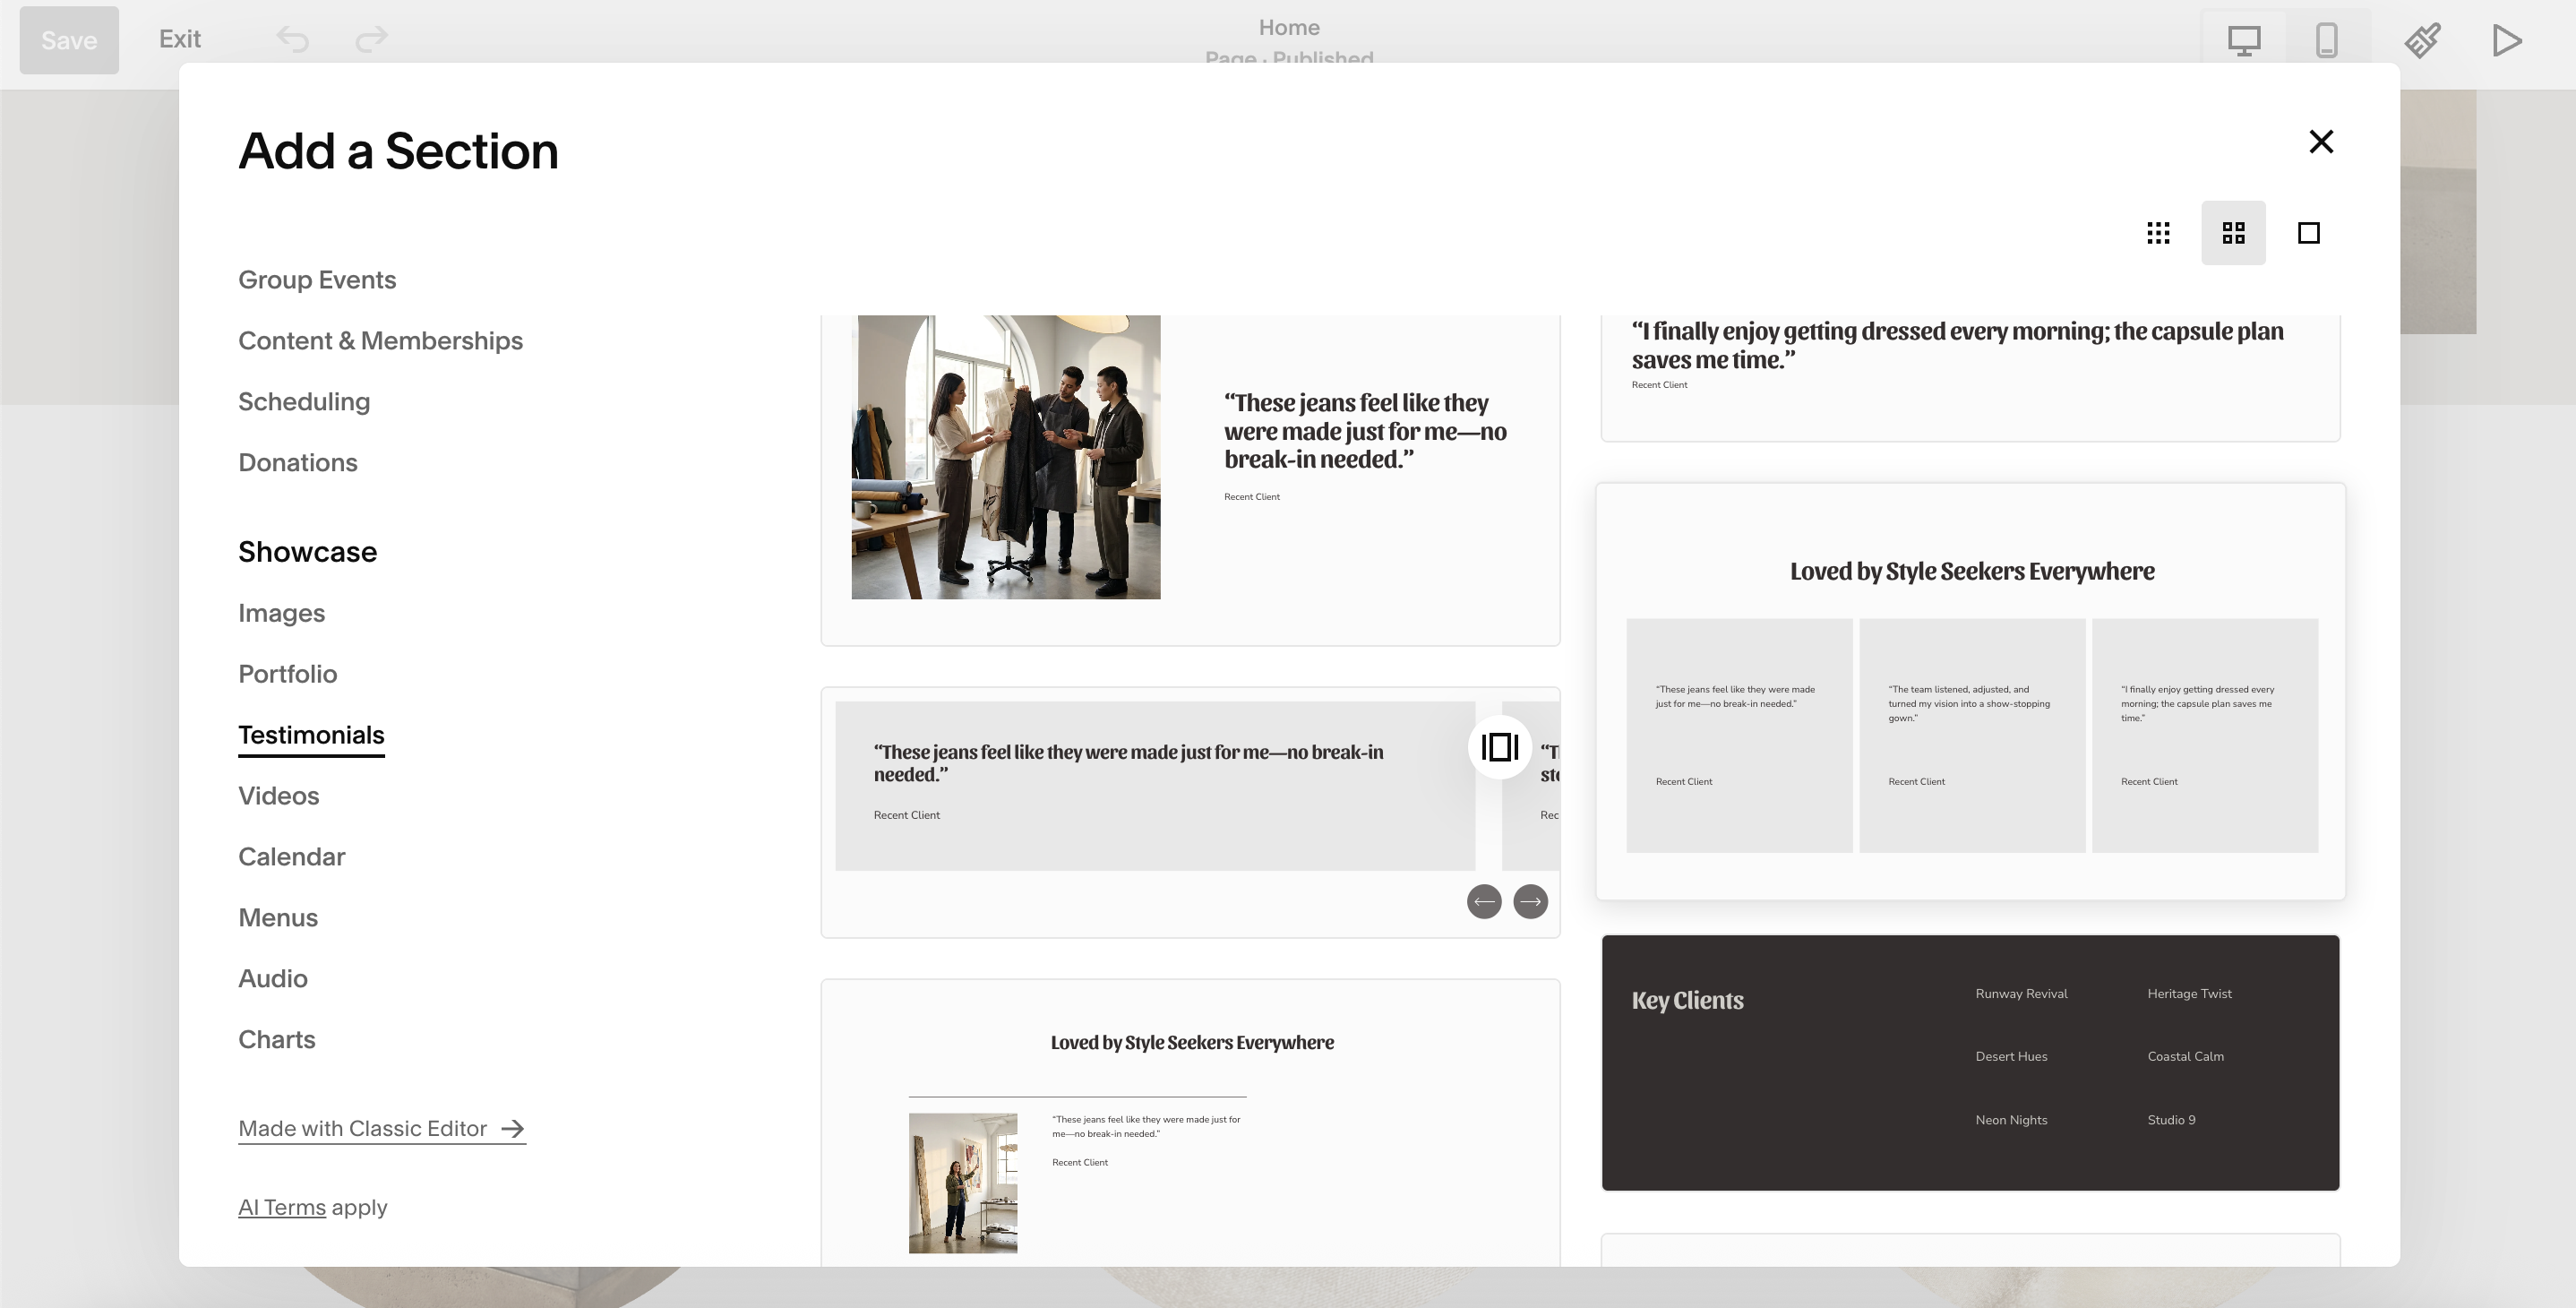
Scroll through the section options until you see Testimonials and select it. Choose the design you like best.
Paste in your customers’ reviews, with their names, and save. Copy each review exactly as the customer wrote it and add their first name or the name they used. Only use reviews you have permission to share.

One thing to know about this setup: visitors can only read the reviews you’ve added. Nobody can leave you a new one, because the section is just text on your page. Every new review has to be added by you, by hand.
Pros
- Quick to set up and no extra tools
- A good start if you have a handful of great reviews
Cons
- Customers can’t write a review themselves
- You have to add every new review manually
- Not tied to individual products, and there’s no star average
- Shoppers can’t tell which reviews are verified
Part 2: Add product reviews on Squarespace with Fera
With Fera you can ask your customers for reviews automatically and shows them on your store. Setup takes five steps, and once it is on, new reviews appear without you editing any page.
Step 1: Connect your Squarespace store
If you’re new to Fera, go to the Fera signup page and select Squarespace.
Click Connect Squarespace Store to continue.

Step 2: Authorize Fera
If you’re already logged in, Fera will ask for a few simple permissions to your store, such as order and fulfillment information and customer information. Approve them to continue.
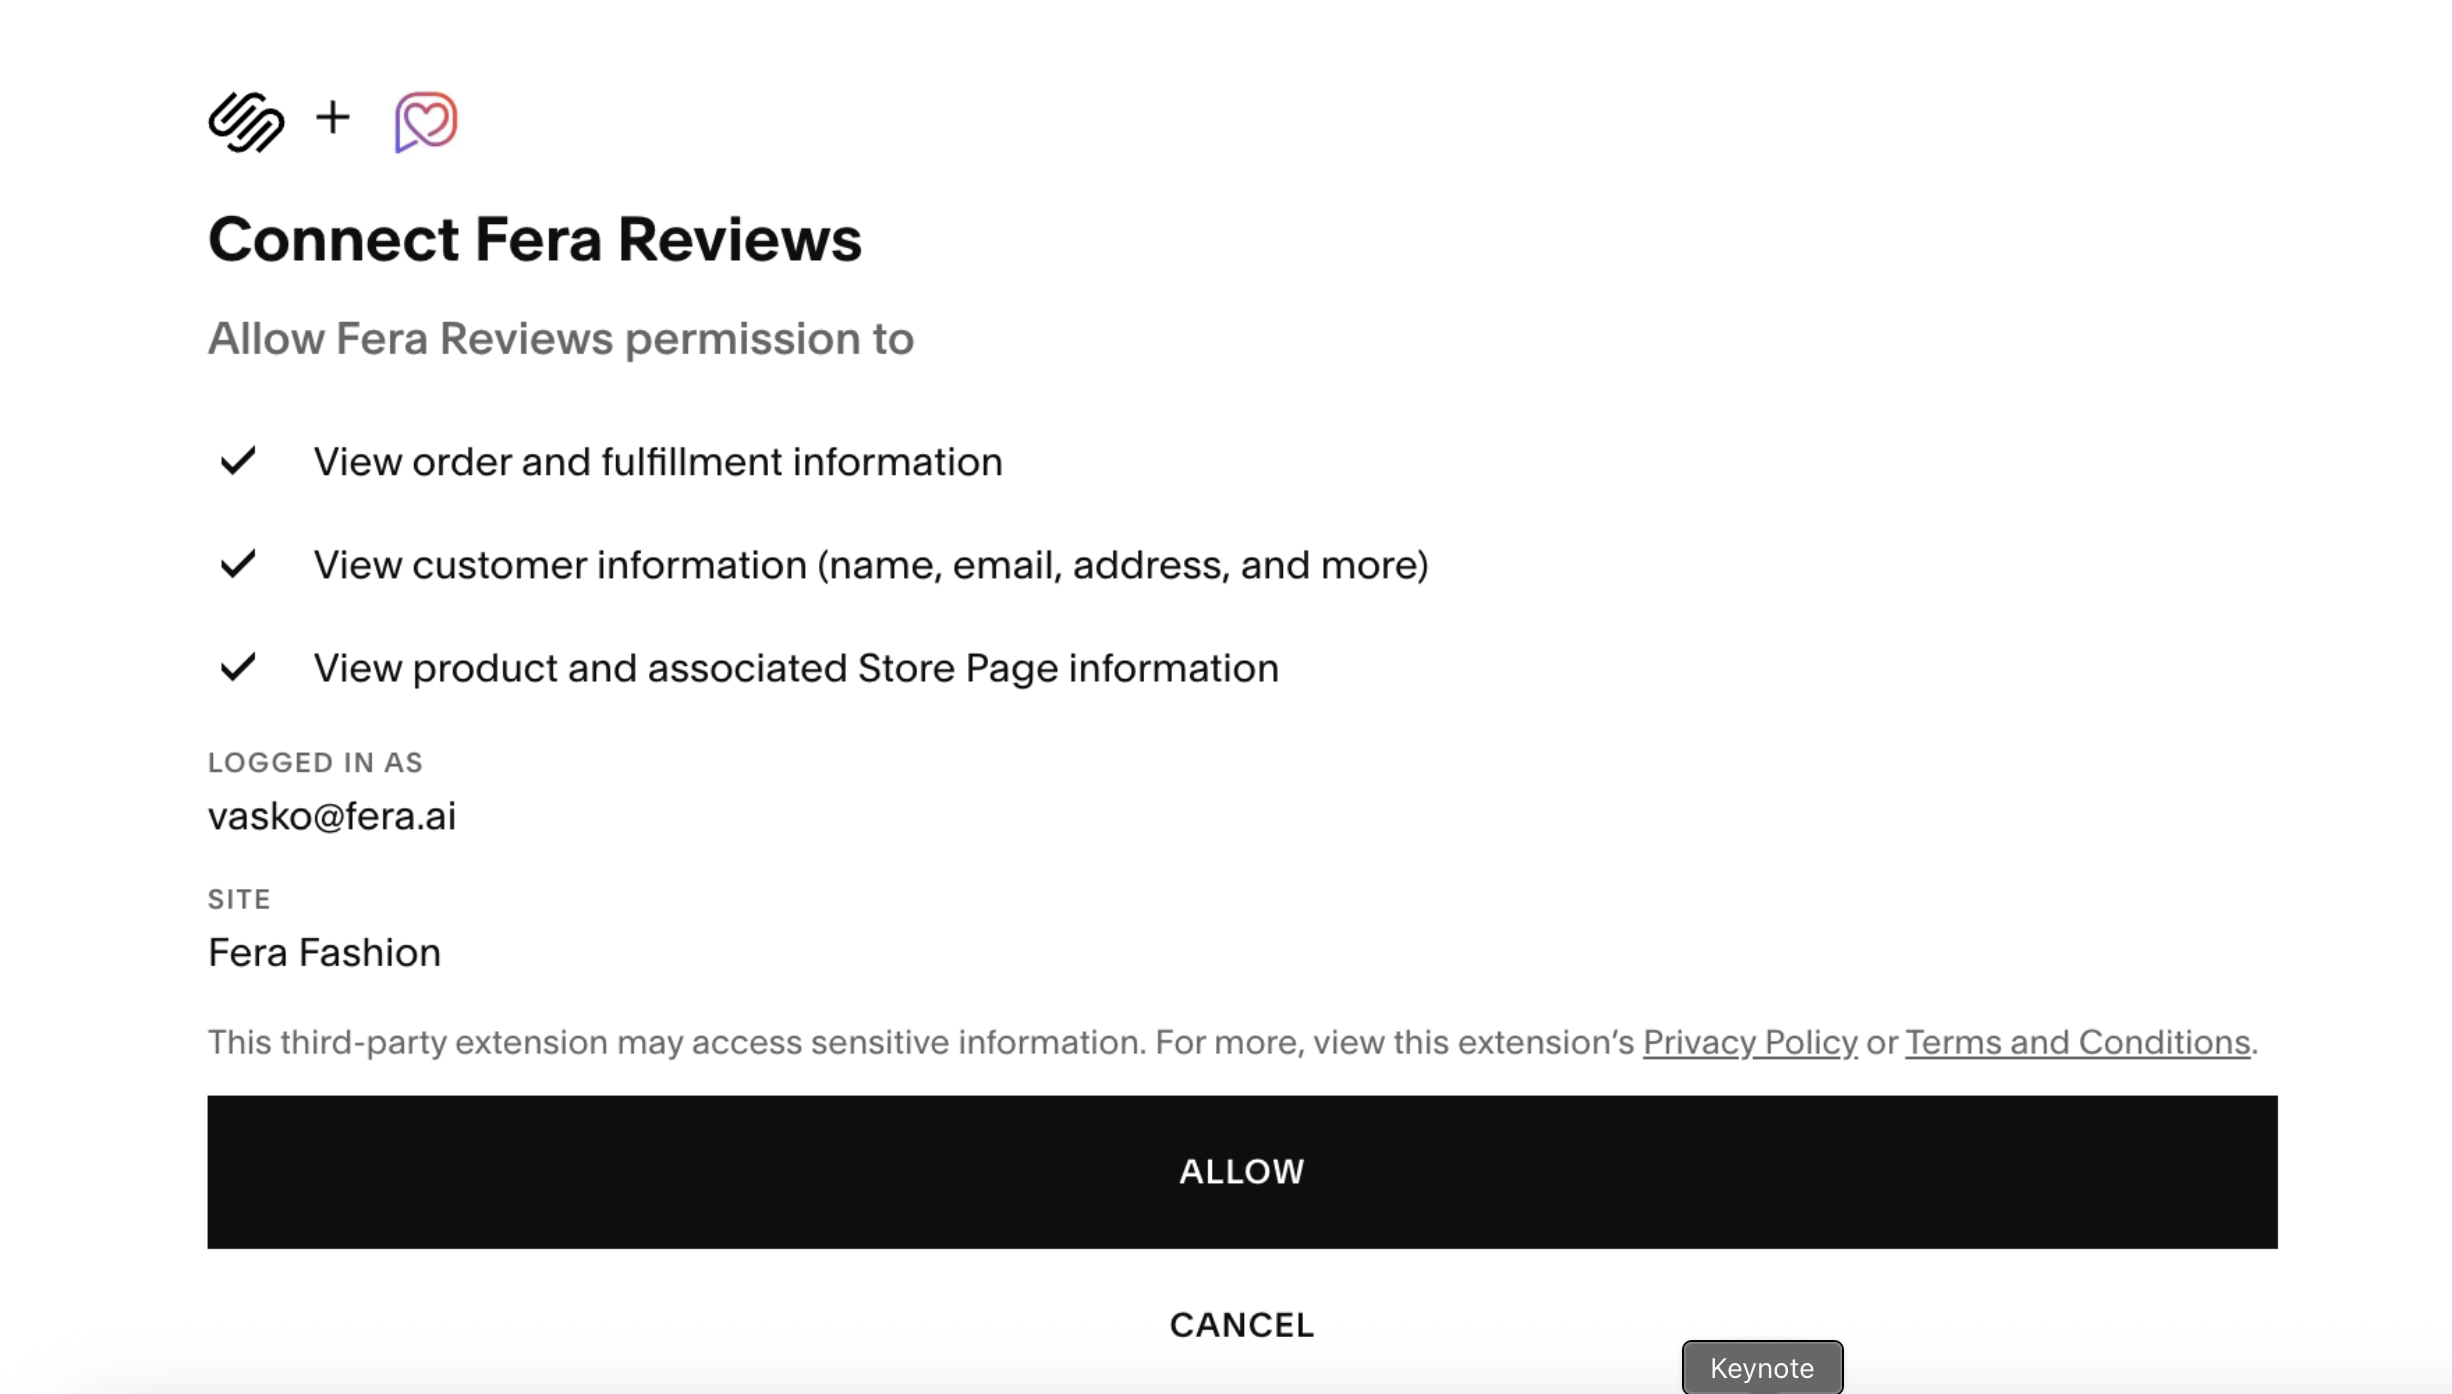
Step 3: Complete the onboarding steps
The onboarding steps are mostly about choosing when to send your review requests and turning on your widgets.
Step 4: Add the Fera scripts to your store
On your Fera setup screen, copy the two scripts generated for your store, then paste them into Code Injection in Squarespace:
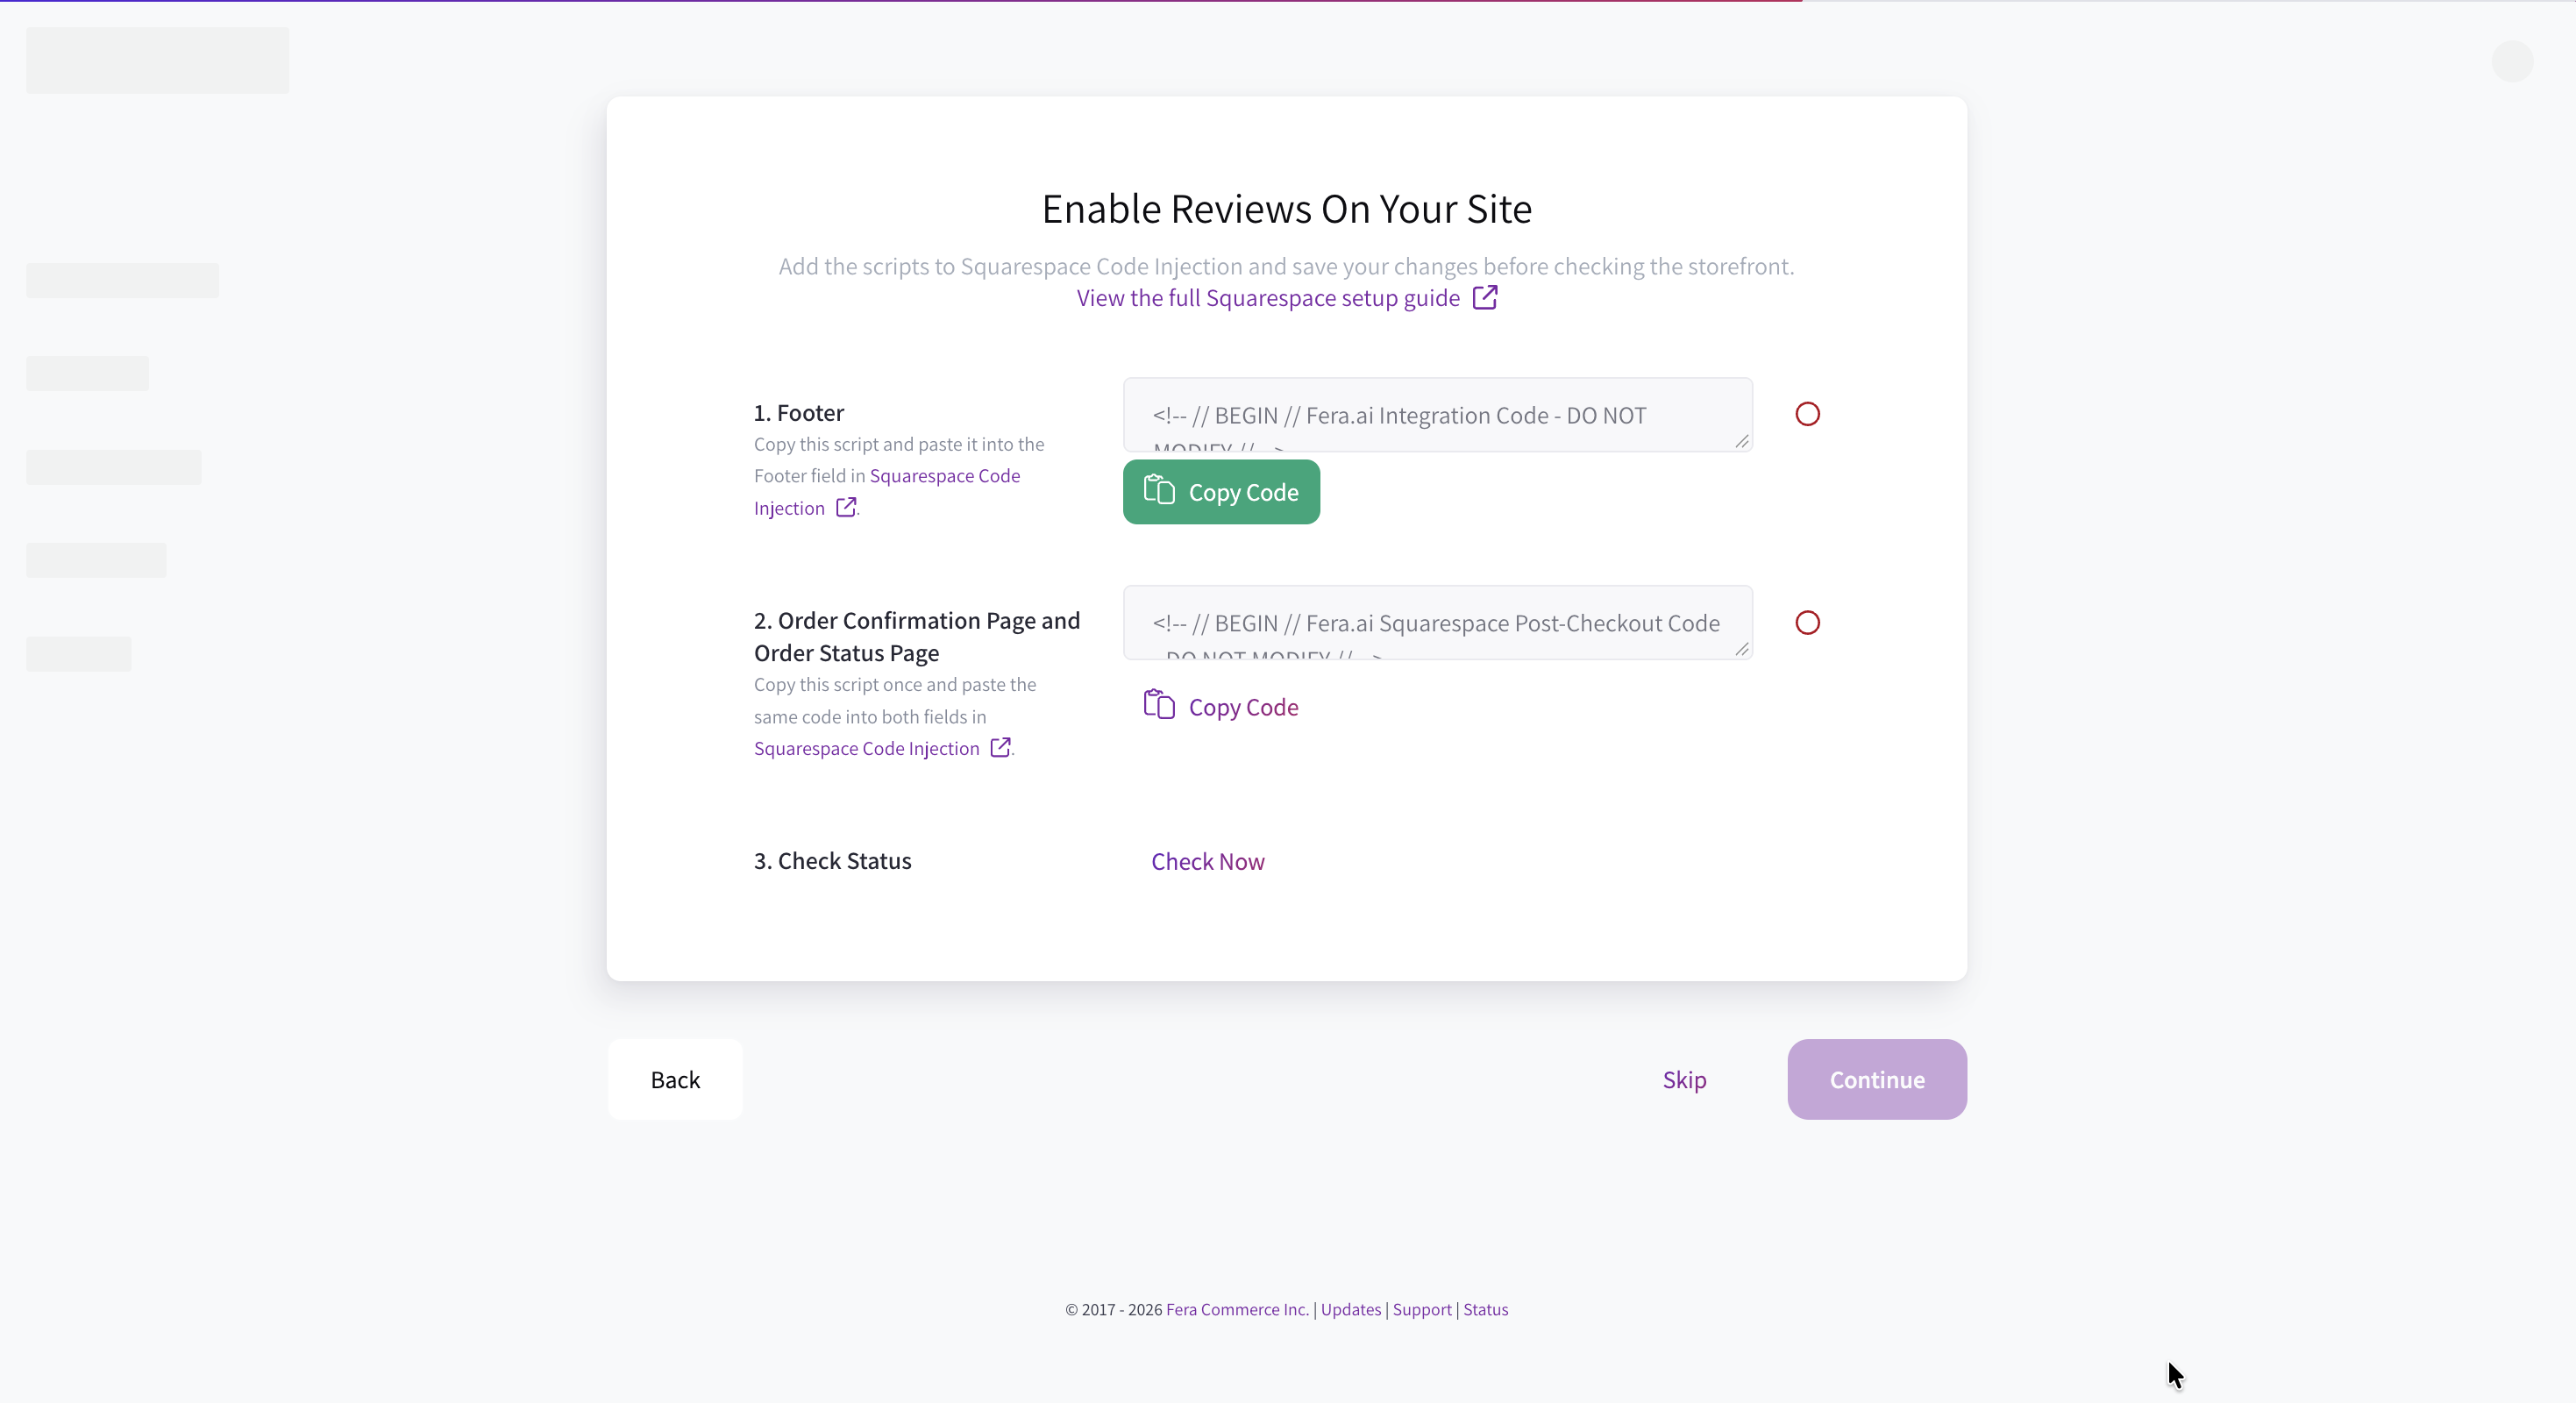
Footer script: click the first Copy Code button and paste the script into the Footer field.
Order confirmation and order status script: click the second Copy Code button and paste that same script into both the Order Confirmation Page field and the Order Status Page field.
Step 5: Activate the review widget
In Fera, open the All Widgets section. You’ll find every type of review widget there, and which one you pick depends on the page where you want reviews to appear.
For example, choose Product Reviews if you want to show reviews on your product pages.
Next choose your display method, you can decide how your reviews will be placed on your store:
- Automatic (Beginner) – Fera will automatically position the widget for you.
- CSS Selector – You can choose a specific location using CSS customization.
- HTML Tag (Advanced) – You should manually add the widget using an HTML tag.
Once you have selected the desired placement, click the Finish button.
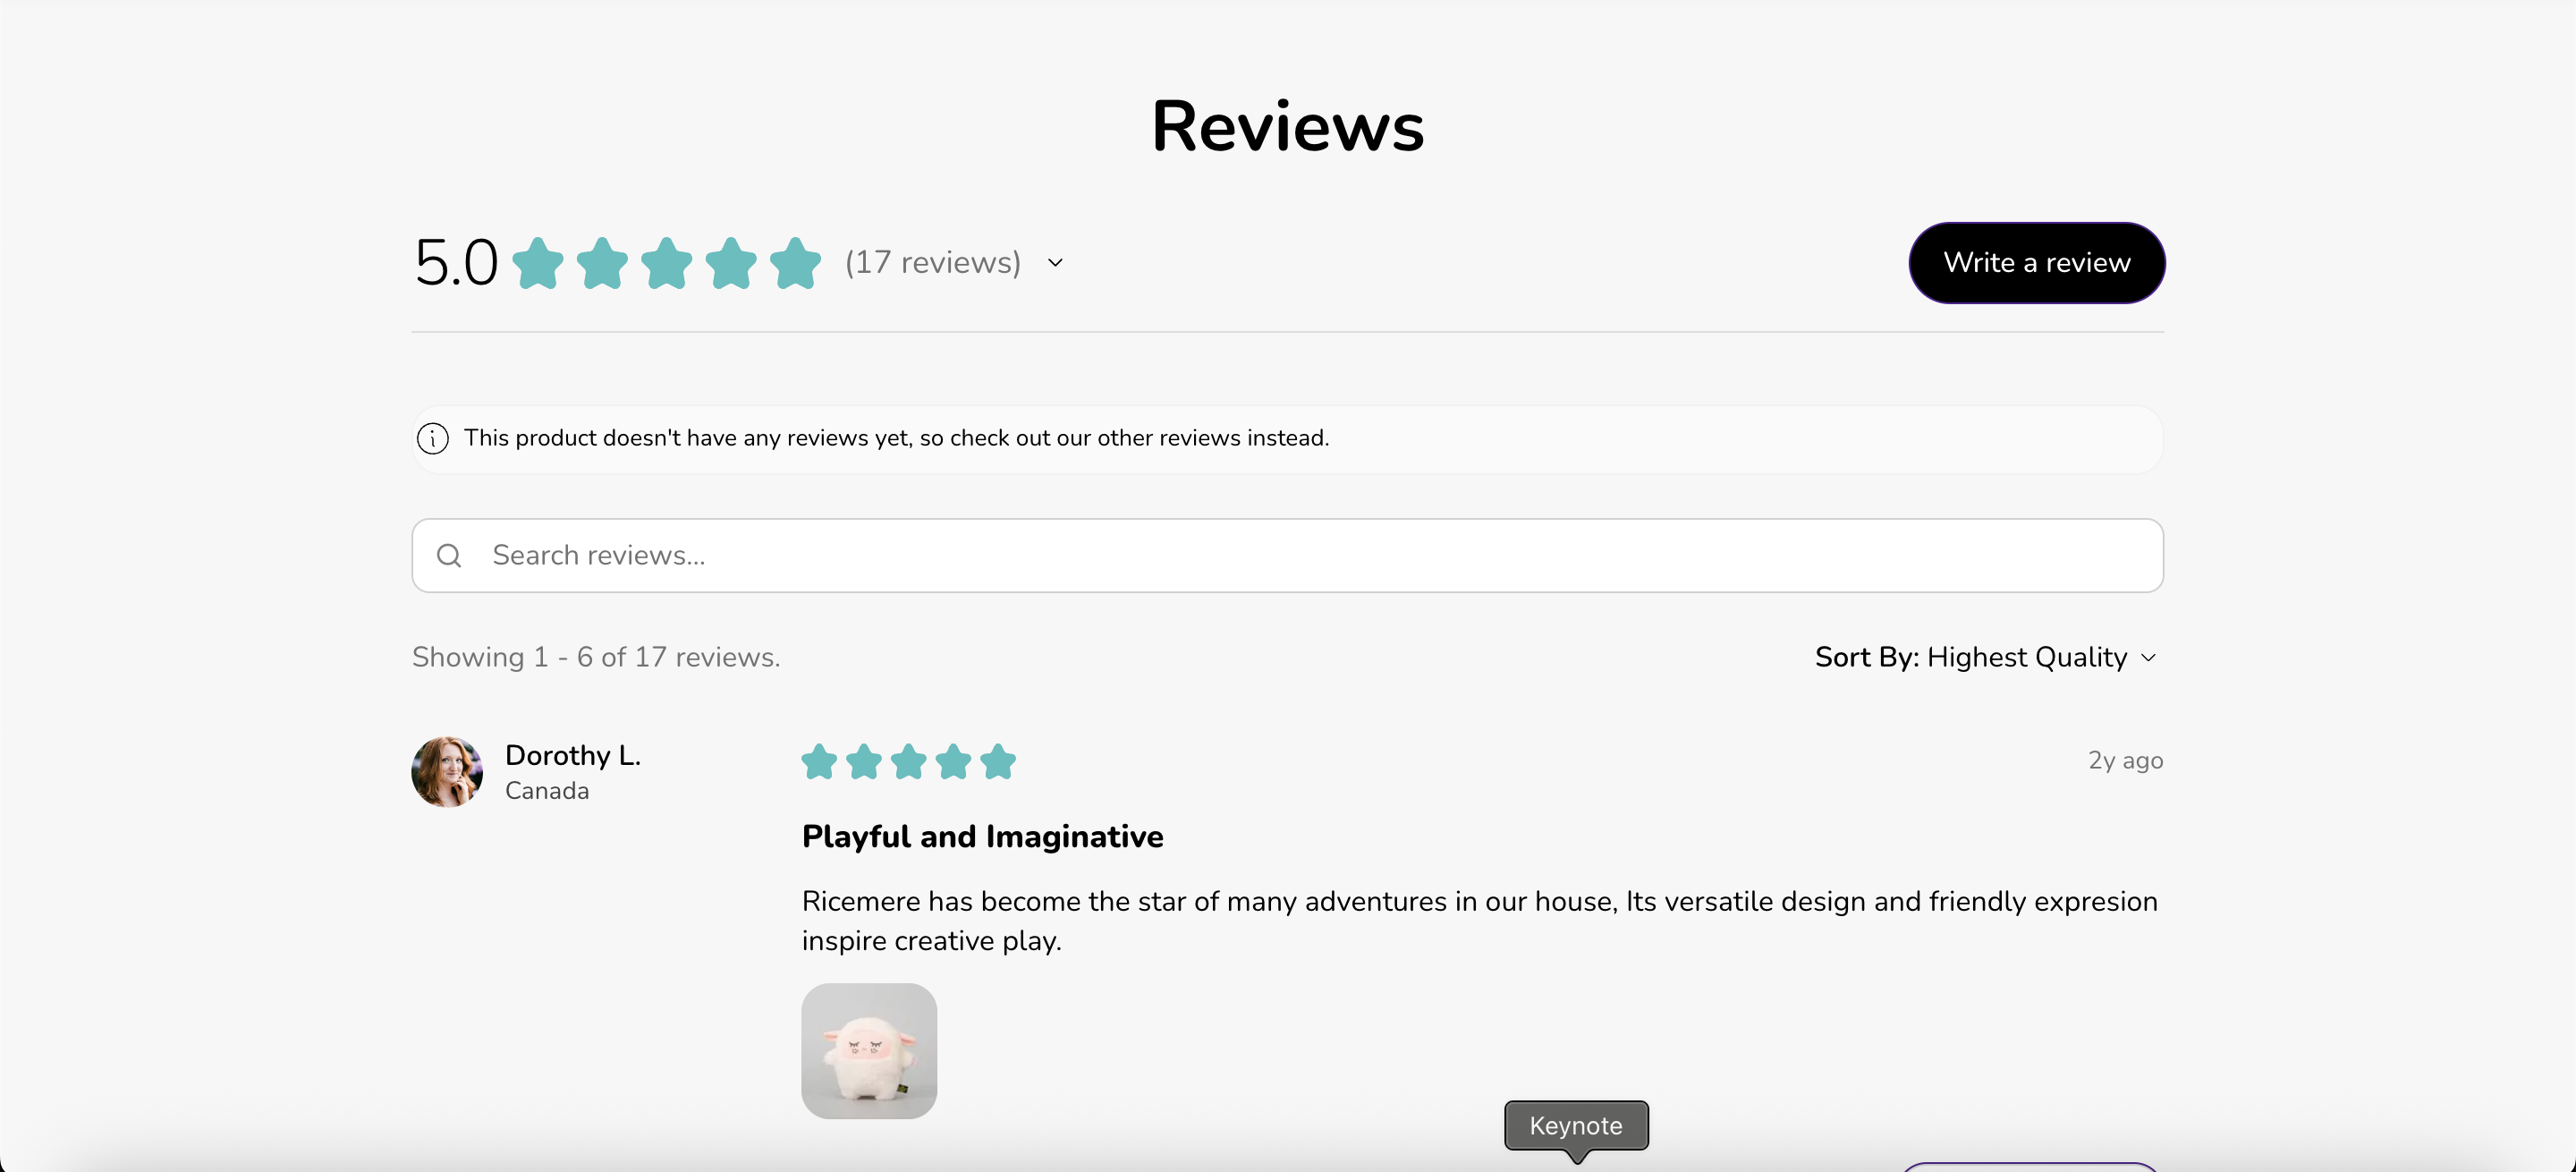
That’s it! You can now test it live on your store. Open one of your product pages to see the Product Reviews widget in action, and check it.
If you already have reviews, you can import them so your product pages don’t start empty.
Common mistakes to avoid
1. Asking too early. A customer can’t review a product that hasn’t arrived yet. Wait until after delivery.
2. Asking only once. A single polite reminder often brings in more replies than one email alone.
3. Hiding or deleting bad reviews. A few honest critical reviews make the good ones believable. Reply politely instead.
Frequently asked questions
Q: Do I need a developer to add reviews to my Squarespace store?
A: No. Setup is mostly copy and paste: you connect your store, paste two scripts into Squarespace, and switch on your widget.
Q: Can customers leave a review directly on my website?
A: Yes. Once Fera is set up, you can create campaign to asks your customers for a review automatically after they order, and the Product Reviews widget on your product pages lets visitors read the reviews.
Q: Can I import the reviews my Squarespace store already has?
A: Yes, so your product pages don’t start empty. If you already have reviews in a spreadsheet, another review app, or on sites like Google, Facebook or Etsy, you can bring them in.
Conclusion
Adding reviews by hand works for a few testimonials, but every new review means editing your page again, and customers can’t leave one themselves. A review app does that work for you: it asks your customers for reviews automatically and shows them on your product pages.
Connect your store to Fera, follow the five steps above, and Fera takes care of requesting reviews after every order, helping you build customer trust and grow your store.